> ## Documentation Index
> Fetch the complete documentation index at: https://docs.supaboard.ai/llms.txt
> Use this file to discover all available pages before exploring further.
# Create and test an automation
> Build a scheduled workflow, check each step, and activate it when ready.
Use an automation for work that should repeat: check stock, prepare a report, or notify a team when a metric needs attention.
## Before you begin
You need Automations feature access and permission to create a workflow. Have the data source, timing, recipients, and desired output ready. To add steps to an existing shared automation, you need **Can create** access.
## 1. Create a draft
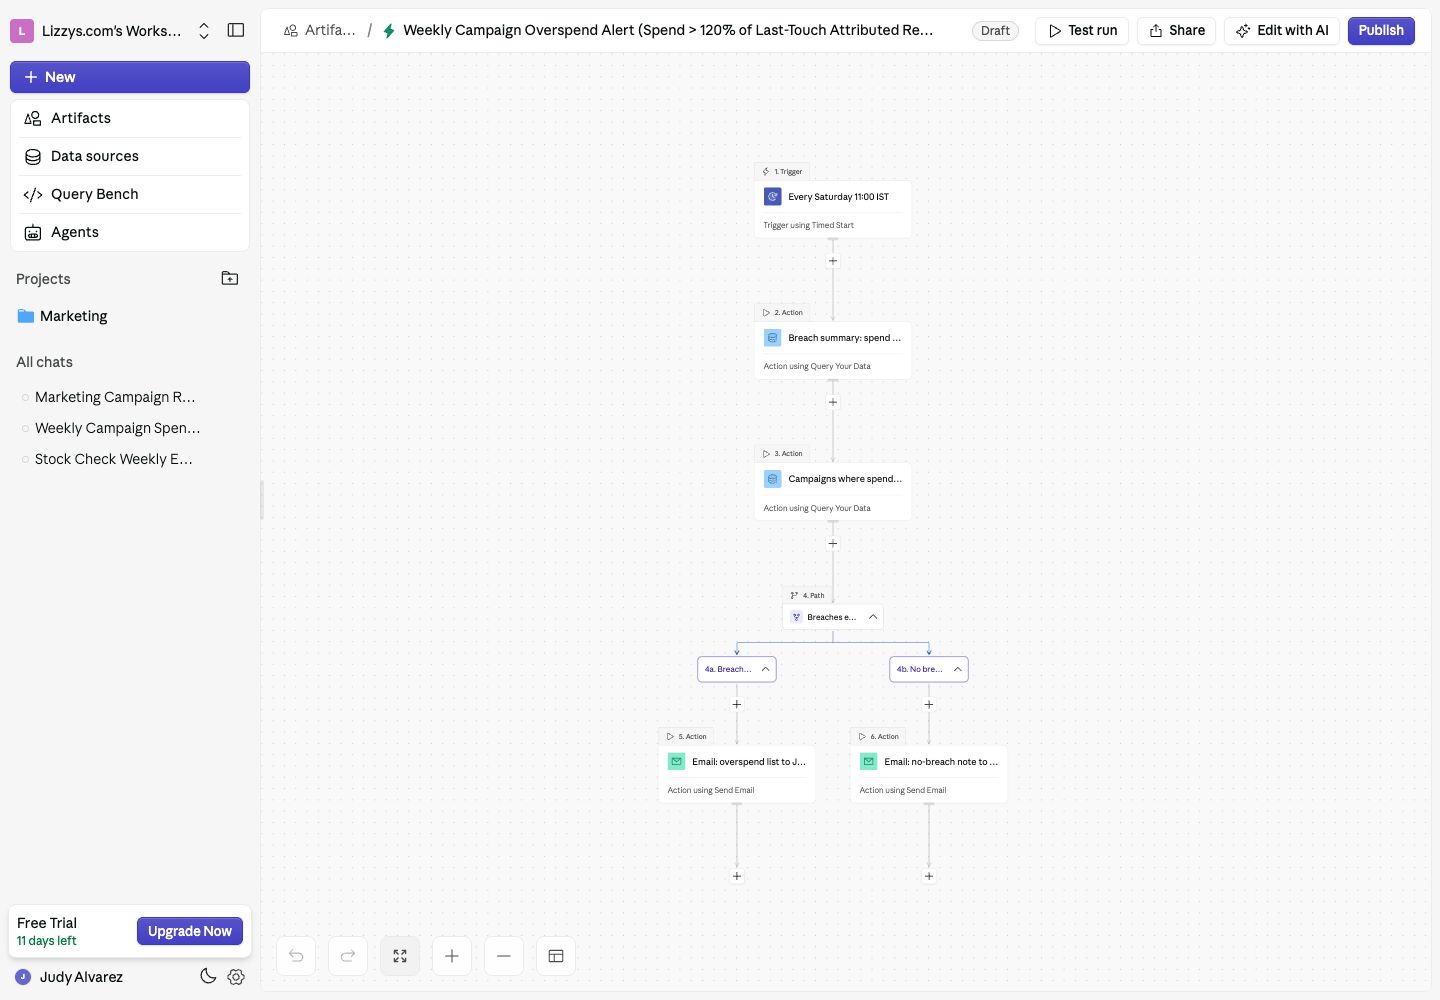
Open **Artifacts → New Artifact → Automation**. Name the workflow and choose its project. Add a description and choose **Build with AI**, or choose **Build Manually** to use the flow editor.
A useful brief includes the check, timing, timezone, and output:
> Every Monday at 9am in Asia/Kolkata, check stock for active products. Prepare a table of products below their reorder level and email it to the operations team. Include a “no shortages” message when none are below the threshold. Show me the workflow before activating it.
 ## 2. Set the trigger
In the manual editor, choose **Add Trigger / First Step**. Use **Timed Start** for a schedule, or **Alerts** for a query-based condition. Select the timezone as well as the time for a clock-based schedule.
For an alert, the query must return a boolean column named `run_alert`. See [Alert queries](/automations/overview#alerts) for the exact result format.
## 3. Add and configure steps
Add the tasks the workflow needs, such as **Query Your Data**, a document step, and **Send Email**. Open each step's **Setup** tab and fill its required fields. Give steps descriptive titles so they are easy to recognize later.
Use the variable picker to pass a query result into the next step. Confirm that email addresses, date ranges, and selected data sources are correct.
## 4. Test deliberately
Open a query step's **Test** tab and run it to inspect its output. Once the individual steps are correct, use **Test Run** to check the complete flow.
Tests execute their steps. Testing an email or webhook step can send the message or request. Use intended test recipients and review the actions before running the full flow.
## 5. Publish and monitor
Choose **Publish** when the trigger and output are correct. A draft does not run automatically. Open **View Logs** on the published automation to inspect scheduled runs and each step's result.
To change a published workflow, use **Edit Automation**, make and check the changes, and publish again. Editing a published workflow stops its scheduled execution until it is republished.
## Expected result
The published automation runs when its trigger is due, and its run history shows the outcome. Check the first scheduled run to confirm the destination and output.
## Next steps
For a dashboard email, use [Schedule dashboard reports](/automations/schedule-dashboard-reports). See the [automation reference](/automations/overview) for actions, variables, and conditions.
This documentation is built and hosted on [Mintlify](https://mintlify.com), a developer documentation platform.
## 2. Set the trigger
In the manual editor, choose **Add Trigger / First Step**. Use **Timed Start** for a schedule, or **Alerts** for a query-based condition. Select the timezone as well as the time for a clock-based schedule.
For an alert, the query must return a boolean column named `run_alert`. See [Alert queries](/automations/overview#alerts) for the exact result format.
## 3. Add and configure steps
Add the tasks the workflow needs, such as **Query Your Data**, a document step, and **Send Email**. Open each step's **Setup** tab and fill its required fields. Give steps descriptive titles so they are easy to recognize later.
Use the variable picker to pass a query result into the next step. Confirm that email addresses, date ranges, and selected data sources are correct.
## 4. Test deliberately
Open a query step's **Test** tab and run it to inspect its output. Once the individual steps are correct, use **Test Run** to check the complete flow.
Tests execute their steps. Testing an email or webhook step can send the message or request. Use intended test recipients and review the actions before running the full flow.
## 5. Publish and monitor
Choose **Publish** when the trigger and output are correct. A draft does not run automatically. Open **View Logs** on the published automation to inspect scheduled runs and each step's result.
To change a published workflow, use **Edit Automation**, make and check the changes, and publish again. Editing a published workflow stops its scheduled execution until it is republished.
## Expected result
The published automation runs when its trigger is due, and its run history shows the outcome. Check the first scheduled run to confirm the destination and output.
## Next steps
For a dashboard email, use [Schedule dashboard reports](/automations/schedule-dashboard-reports). See the [automation reference](/automations/overview) for actions, variables, and conditions.
This documentation is built and hosted on [Mintlify](https://mintlify.com), a developer documentation platform.