

Before you begin
You must own the dashboard to manage its sharing. Review the data it contains and decide what recipients should be able to do.Share with specific people
- Open the dashboard and select Share.
- Find the person by name or email.
- Choose the access level beside the name field.
- Select Share and review People with access.
- Use Copy link to get the dashboard address.
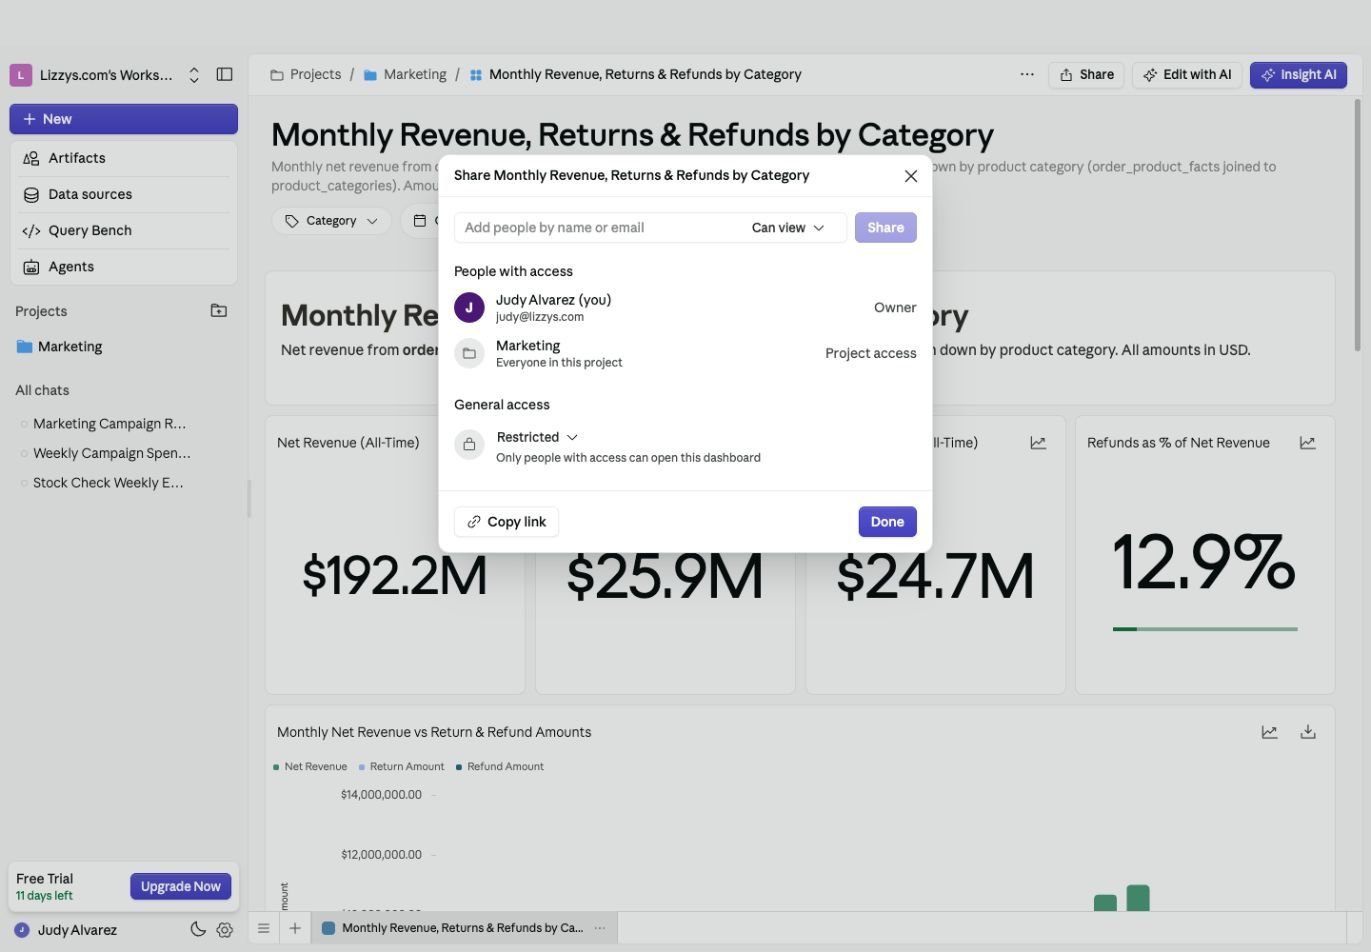
Check both People with access and General access before distributing a dashboard link.
Choose an access level
Editing and creating also require an editing role in the workspace. Sharing, deleting the dashboard, and managing its embeds remain owner actions.
Check project and general access
If the dashboard belongs to a project, People with access also shows access inherited from that project. Review project sharing when a person’s access comes from there. General access controls whether a wider audience can open it:- Restricted: only people who already have access.
- Everyone in the workspace: workspace members receive the selected access level.
- Anyone with the link: people with the link receive the selected access level.